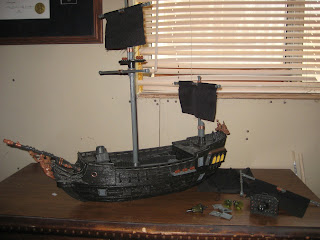
Rocktroll has already done a full conversion of the Black Pearl, which he renamed the Fool's Errand, and he was generous enough to share his templates with me to help speed up the process. Also, based on what he did and what he would change I have decided not to make a lower deck within the ship. I will not be doing this for a couple of reasons: first, it will take more time and second, it will not really be useable during Heroscape game play. So, I have made some adjustments to the templates and rescanned them to only include the decks that I will be using. The templates will be used to create the new decks and act as a stencil for the hex layout.
If you don't like the hex layout that I chose you will need to print/create the deck templates then you will need to print the Hex Grid and cut out the hexes to be able to trace onto your templates.
Now it is time to determine what pegs you need to keep for attachment
of things like the masts, etc. then remove the rest. This is the most
tedious part of the project. I used a dremel to do this. After removing the pegs it is time to do some cutting to remove stairs so that the decks will sit flat. As you can see in the pictures below you will need to cut the bottom stair off of the stern, the front stair off of the bow, and the top 3 stairs off of the 4 pieces of the upper hull.
Now a quick test fit for the templates.
I also cut the sides of the mast connectors off. Here is a picture comparing the before and after.
For the main/lower portion of the hull you don't need to remove any pegs because they will be covered up. I also want to glue the ship together so it will not fall apart, but if you want to be able to take it apart you can skip this step. I started gluing it together in sections The ship comes in 4 main pieces. I will start by gluing 2 pieces to each other.
I used super glue to glue the pieces together you want to apply the glue to the edges like so:
You will also want to make sure there is no excess glue leaking on the external portions, as this will have to be removed latter.
Now I have to decide what to do about the ugly non-realistic cannon ports...


No comments:
Post a Comment